
In this article, we’re going to explore a collection of 10 delightful doggy DIY projects that will not only bring joy to your pup’s heart but also save you some pennies. From homemade toys that will keep their tails wagging to delicious treats that will make their taste buds sing, let’s embark on a journey of crafting canine happiness.
If your furry friend is in need of some extra love and attention. Or perhaps you’re looking for creative and budget-friendly ways to keep your canine companion entertained and healthy? Look no further! Check out our amazing DIY ideas!
Contents
- 0.1 Tug-of-War Rope Toy
- 0.2 Frozen Peanut Butter Treats
- 0.3 Sock Squeaky Toy
- 0.4 Sweet Potato Chews
- 0.5 Knotted Fabric Ball
- 0.6 Chicken and Carrot Dog Biscuits
- 0.7 Cardboard Box Maze
- 0.8 No-Sew Fleece Blanket
- 0.9 Banana and Blueberry Popsicles
- 0.10 Interactive Bottle Puzzle
- 1 Final Thoughts on Doggy DIY Projects
- 2 FAQs (Frequently Asked Questions)
Tug-of-War Rope Toy
Few things bring as much joy to a dog as a spirited game of tug-of-war. The playful tugging, the excitement in their eyes, and the pure canine enthusiasm make it a beloved activity for dogs of all ages. But what if we told you that you can take this joy to the next level by crafting a tug-of-war rope toy for your pup? Not only is it incredibly easy to make, but it’s also an excellent way to strengthen your bond and keep your furry friend mentally and physically engaged.
Materials You’ll Need: Old T-shirts or Towels
Before you start, gather some old t-shirts or towels that you no longer need. This DIY project is not only cost-effective but also environmentally friendly, as it repurposes items you might otherwise discard.
Step 1: Cut the Fabric into Strips
Begin by cutting the fabric into strips. The width of the strips can vary depending on your preference, but a typical width is around 1 to 2 inches. The length of the strips can also vary, but it’s a good idea to make them at least a foot long.
Step 2: Braid Them Together
Take three or more of these fabric strips and tie a knot at one end. This knot will serve as the starting point for your braid. Now, begin braiding the strips together just as you would braid hair. Over and under, over and under – it’s a simple and rhythmic process.
Step 3: Tie Knots at Each End
Once you’ve braided the strips together, tie another knot at the opposite end. This knot secures the braid and prevents it from unraveling. You can also trim any excess fabric at this point.
Step 4: Voila! Your Tug-of-War Rope Toy Is Ready
And just like that, you’ve crafted a homemade tug-of-war rope toy for your pup! It’s a testament to the beauty of simplicity – a few old t-shirts or towels transformed into a source of endless fun for your furry companion.
Why Your Dog Will Love It
Dogs have a natural instinct to play and engage in activities that mimic their predatory behaviors. Tug-of-war is one such activity that taps into this instinct. Here’s why your pup will adore their new rope toy:
1. Physical Exercise: Tug-of-war provides an excellent workout for your dog’s muscles and joints. It’s a great way to keep them physically fit and healthy.
2. Mental Stimulation: The strategic aspect of tug-of-war, where your dog needs to figure out how to gain an advantage, offers mental stimulation. It keeps their mind sharp and engaged.
3. Bonding Time: Playing tug-of-war with your pup strengthens the bond between you. It’s an interactive activity that fosters trust and enhances your relationship.
4. Energy Outlet: Dogs with excess energy can find an outlet in tug-of-war. It’s an effective way to tire them out, especially on days when outdoor exercise might not be possible.
5. Dental Health: The act of chewing on the fabric can also have a positive effect on your dog’s dental health by helping to clean their teeth.
Remember to play tug-of-war safely and set some ground rules. Teach your pup commands like “drop it” or “leave it” to ensure the game remains enjoyable for both of you.
Frozen Peanut Butter Treats
When the sun is blazing, and the temperatures are soaring, we all crave something refreshing and delicious to cool us down. Well, guess what? Your furry friend feels the same way! Fortunately, we’ve got a fantastic solution for those hot summer days – homemade frozen peanut butter treats. These simple, icy delights are not only a fantastic way to keep your pup cool but also a delightful treat that will have them licking their chops in delight.
Ingredients You’ll Need: Plain Yogurt, Peanut Butter
Before you start crafting these frosty canine creations, gather the following ingredients:
- Plain Yogurt: Opt for plain, unsweetened yogurt without any added flavors or sweeteners. Yogurt is not only a cooling ingredient but also packed with probiotics that promote good gut health for your pup.
- Peanut Butter: Choose natural, unsalted peanut butter without any additives like xylitol, which can be harmful to dogs. Peanut butter adds a delicious flavor and creaminess to the treats.
How to Make It: A Simple and Cool Process
Now, let’s dive into the step-by-step process of crafting these delightful frozen peanut butter treats:
Step 1: Mix Plain Yogurt and Peanut Butter
In a mixing bowl, combine plain yogurt and peanut butter. The ratio can vary depending on your pup’s taste, but a common starting point is one part peanut butter to two parts yogurt. You can adjust this ratio to make the treats more or less peanut-buttery, based on your dog’s preferences.
Step 2: Blend Until Smooth
Use a whisk or a spoon to thoroughly blend the yogurt and peanut butter until you achieve a smooth and creamy mixture. This ensures that your treats have a consistent texture and flavor.
Step 3: Fill Ice Cube Trays
Take your mixture and carefully pour it into ice cube trays. The ice cube trays provide a convenient way to portion out the treats into small, bite-sized servings for your pup.
Step 4: Freeze Until Solid
Place the ice cube trays in your freezer and let the treats freeze until they are solid. This usually takes a few hours, but it’s a good idea to check on them to ensure they’re thoroughly frozen.
Step 5: Serve and Watch Your Pup’s Delight
Once the treats are frozen solid, it’s time for the best part – serving them to your eager and hot pup! Pop the treats out of the ice cube trays and offer them to your furry friend one at a time. You’ll be greeted with enthusiastic tail wags and perhaps some adorable doggy dance moves.
Why Your Dog Will Love Them
These homemade frozen peanut butter treats are more than just a way to cool down; they’re a delightful snack with some fantastic benefits:
1. Refreshing Cooling: On a hot day, nothing beats the feeling of something cool and soothing. These treats help lower your dog’s body temperature and provide relief from the heat.
2. Tasty Delight: The combination of plain yogurt and peanut butter creates a creamy and savory flavor that dogs absolutely adore. It’s a taste sensation that will have them coming back for more.
3. Nutritional Value: Plain yogurt is a source of probiotics, which can aid in your dog’s digestion. Peanut butter adds healthy fats and protein to their diet.
4. Mental Stimulation: Working on these treats can be mentally stimulating for your pup. They’ll need to figure out how to lick or chew them to get to the delicious core.
Sock Squeaky Toy
Dogs have a knack for finding joy in the simplest things, and few things captivate their attention like a squeaky toy. That delightful noise can turn an ordinary playtime into an extraordinary adventure. But what if you could make your very own squeaky toy for your furry friend, using items you probably have lying around your home? Well, now you can! Introducing the DIY Sock Squeaky Toy – a hit with dogs who adore interactive play and a fantastic way to repurpose old socks and bottles.
Materials You’ll Need: An Old Sock, An Empty Plastic Bottle
Before you embark on this DIY adventure, gather the following materials:
- An Old Sock: Find an old sock that you no longer need. It’s a perfect candidate for this craft.
- An Empty Plastic Bottle: An empty, clean plastic bottle, such as a water bottle or soda bottle, will serve as the noisemaking core of your toy.
How to Make It: Crafting Squeaky Joy
Creating your sock squeaky toy is a breeze. Just follow these simple steps:
Step 1: Prepare the Sock
Start by ensuring your sock is clean and free from any dirt or debris. If it’s been lying around for a while, a quick wash might be in order.
Step 2: Insert the Plastic Bottle
Take the empty plastic bottle and place it inside the sock. You’ll want to position the bottle so that the open end of the sock covers the neck of the bottle, leaving the rest of the sock to drape over the bottle’s body.
Step 3: Tie a Knot at the Open End
Now, gather the open end of the sock and tie a secure knot. This knot will keep the sock in place, and it’s where the magic happens. When your dog squeezes or chews on the sock-covered bottle, the plastic bottle inside will create a satisfying crunching sound that dogs find utterly captivating.
Step 4: Trim Excess Fabric (Optional)
If you have excess fabric at the open end of the sock after tying the knot, you can trim it to make the toy more visually appealing. However, be sure not to cut the knot itself, as it’s essential for keeping the toy together.
Step 5: Present the Toy to Your Pup
Once your DIY sock squeaky toy is ready, it’s time for the grand reveal to your furry friend. Hand it over to your pup and watch as they explore this new and intriguing plaything. You’re likely to be met with wagging tails, playful paws, and perhaps a few adorable barks of excitement.
Why Your Dog Will Love It
The DIY Sock Squeaky Toy isn’t just a fun and easy craft project; it’s also a source of endless amusement for your dog. Here’s why they’ll be head over paws for it:
1. Satisfying Crunch: The plastic bottle inside creates an enticing crunching sound that mimics prey, making it irresistible to your pup.
2. Interactive Play: This toy encourages interactive play, providing mental and physical stimulation. Whether it’s a game of fetch or a tug-of-war, your dog will have a blast.
3. Repurposing Old Items: You’re not only providing entertainment for your pup but also doing your part for the environment by upcycling old socks and bottles.
4. Durability: The sock acts as a protective cover for the plastic bottle, making it more durable and safe for your dog to play with.
Sweet Potato Chews
Dogs have an innate love for chews and treats, and they’ll do just about anything for a tasty snack. While store-bought chews are readily available, there’s something incredibly satisfying about crafting your own homemade dog treats. That’s where sweet potato chews come into play. These DIY delights are not only scrumptious but also packed with essential vitamins and fiber, making them a wholesome addition to your dog’s diet. Say goodbye to store-bought chews filled with additives and hello to a simple, nutritious, and tail-wagging treat!
What You’ll Need: Sweet Potatoes
The star of this DIY show is the humble sweet potato. Here’s what you’ll need:
- Sweet Potatoes: Opt for fresh sweet potatoes, which are nutrient-rich and a favorite among dogs. They’re a fantastic source of dietary fiber, vitamins like A and C, and essential minerals.
How to Make It: Crafting Sweet Potato Chews
Creating these wholesome chews for your pup is a breeze. Follow these simple steps:
Step 1: Prep the Sweet Potatoes
Begin by thoroughly washing and scrubbing the sweet potatoes. You want to make sure they’re clean and free of dirt or debris.
Step 2: Slice into Thin Strips
With a sharp knife or a mandolin slicer, carefully slice the sweet potatoes into thin strips. Aim for a thickness of around 1/8 to 1/4 inch. Uniform thickness ensures even baking.
Step 3: Bake Until Crispy
Preheat your oven to around 250°F (120°C). Place the sweet potato strips on a baking sheet lined with parchment paper or a silicone baking mat. Avoid overcrowding the strips to ensure even cooking. Bake them in the preheated oven for approximately 2-3 hours, flipping them halfway through.
Step 4: Check for Crispiness
The sweet potato chews are ready when they’re crispy and have the texture of chips. Keep a close eye on them during the last 30 minutes of baking to prevent overcooking. The thickness of the strips and your oven’s temperature may vary, so adjust the baking time accordingly.
Step 5: Cool and Serve
Allow the sweet potato chews to cool completely before serving them to your eager pup. It’s essential to let them cool to room temperature to avoid any risk of burning your dog’s mouth.
Why Your Dog Will Love Them
Homemade sweet potato chews are more than just a tasty treat; they offer numerous benefits that will have your dog eagerly waiting for their next serving:
1. Delicious Flavor: Dogs adore the natural sweetness of sweet potatoes. It’s a flavor that’s sure to tickle their taste buds.
2. Nutrient-Rich: Sweet potatoes are packed with vitamins, especially vitamin A and vitamin C, which support your dog’s overall health.
3. Dietary Fiber: The fiber content in sweet potatoes aids in digestion and promotes a healthy gut.
4. Long-Lasting Chew: These chews are perfect for dogs who enjoy prolonged chewing sessions, helping to satisfy their natural instinct to gnaw.
5. Additive-Free: Unlike many store-bought chews, homemade sweet potato chews are free from additives, preservatives, and artificial flavors.
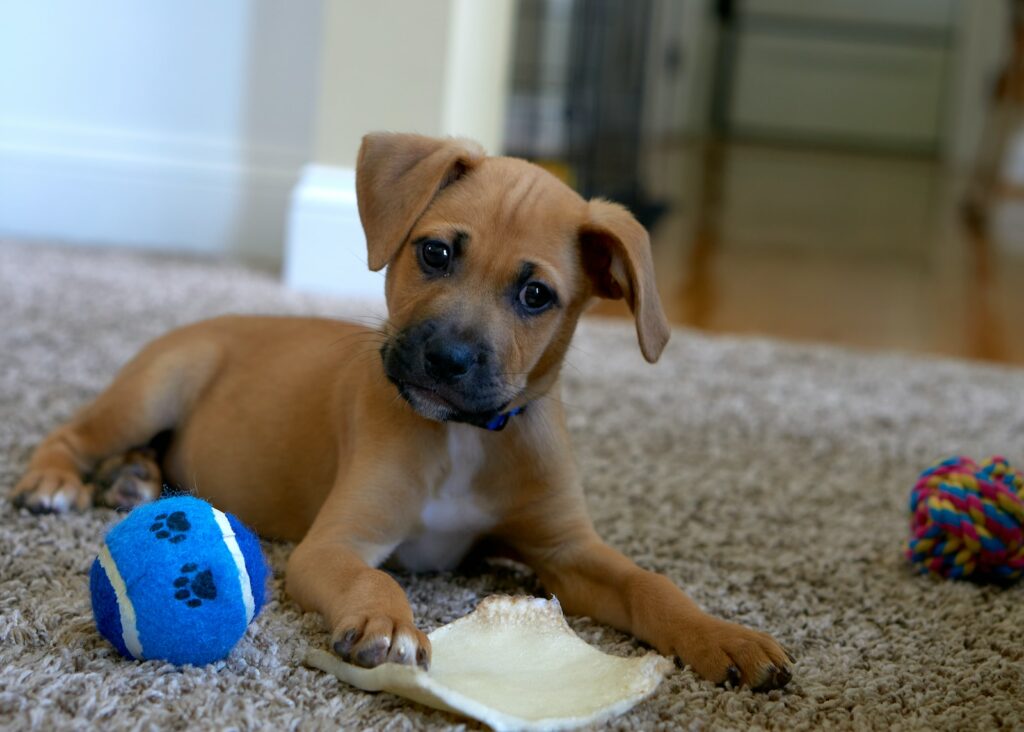
Knotted Fabric Ball
Playtime is an essential part of a dog’s day. It’s when they get to express their boundless energy, engage in activities they love, and, most importantly, bond with their human companions. While there’s no shortage of store-bought toys, creating your own DIY toys can be a rewarding and cost-effective way to provide entertainment for your furry friend. Enter the Knotted Fabric Ball – a delightful creation that’s not only easy to make but also perfect for games of fetch and tug-of-war. Plus, when it gets slobbery and dirty, it’s a cinch to clean.
What You’ll Need: Fabric Scraps, A Tennis Ball
Before you begin crafting this exciting toy, gather the following materials:
- Fabric Scraps: Search your home for old fabric scraps, perhaps from old clothes or linens. The fabric can be colorful and diverse, making the toy visually appealing to your pup.
- A Tennis Ball: A standard tennis ball serves as the core of your knotted fabric ball. Its size and bounce make it perfect for interactive play.
How to Make It: Crafting Playtime Fun
Creating a knotted fabric ball is a straightforward process that you and your pup will enjoy. Follow these simple steps:
Step 1: Cut the Fabric into Strips
Start by cutting the fabric scraps into strips. The width of the strips can vary, but a typical width is around 1 to 2 inches. The length can also vary, but it’s a good idea to make them at least a foot long. Cutting a variety of fabric strips will add visual interest to the toy.
Step 2: Tie the Fabric Strips Around the Tennis Ball
Take one of the fabric strips and tie it securely around the tennis ball. Make sure the knot is tight to keep the fabric in place. Leave the ends of the strip hanging free; these will become the “tails” of your knotted ball.
Step 3: Continue Tying Strips
Repeat the process with additional fabric strips. You can use different colors or patterns for a more visually stimulating toy. Continue tying strips around the tennis ball until it’s completely covered in a colorful array of fabric.
Step 4: Trim Any Excess Fabric
Once you’ve covered the tennis ball to your satisfaction, trim any excess fabric from the strips. You want the fabric to be long enough to create knots but not so long that it becomes unwieldy.
Step 5: Present the Toy to Your Pup
Your DIY knotted fabric ball is now ready for action! Hand it over to your pup, and watch as they enthusiastically explore this new and exciting plaything. You can use it for games of fetch, tug-of-war, or simply let your dog enjoy some solo playtime.
Why Your Dog Will Love It
The knotted fabric ball isn’t just a fun toy; it offers a host of benefits that will have your pup wagging their tail in delight:
1. Interactive Play: This toy is perfect for interactive play sessions, promoting bonding between you and your furry friend.
2. Versatile Fun: Use it for a game of fetch to get your dog running and exercising or engage in a friendly tug-of-war match.
3. Mental Stimulation: The various knots and fabric textures provide mental stimulation, keeping your dog’s mind active.
4. Easy to Clean: When the toy gets slobbery or dirty, simply toss it in the washing machine for a quick cleanup.
5. Environmentally Friendly: Repurposing old fabric scraps is an environmentally friendly way to create dog toys while reducing waste.
Chicken and Carrot Dog Biscuits
Treats are a language of love that dogs understand perfectly. Whether it’s for training, rewards, or just to see that tail wag with delight, a tasty dog biscuit is a surefire way to make your pup’s day. While there’s no shortage of store-bought options, crafting your own homemade dog biscuits adds a personal touch and allows you to ensure that your furry friend enjoys the very best. Enter the Chicken and Carrot Dog Biscuits – a delectable and nutritious treat that your pup will beg for more.
What You’ll Need: Flour, Chicken Broth, Shredded Carrots
Before you start baking these mouthwatering treats, gather the following ingredients:
- Flour: All-purpose flour is typically used for dog biscuits. It provides the base structure for the dough.
- Chicken Broth: Opt for low-sodium chicken broth to add a savory flavor to the biscuits. It’s best to use broth without any added spices or seasonings.
- Shredded Carrots: Fresh carrots, grated or shredded, will provide a burst of color, flavor, and nutrients to the biscuits.
How to Make It: Crafting Canine Delights
Creating these wholesome chicken and carrot dog biscuits is a delightful process. Follow these simple steps:
Step 1: Mix Flour and Shredded Carrots
In a mixing bowl, combine the flour and shredded carrots. The amount of shredded carrots can vary based on your preference, but a good starting point is about one cup of shredded carrots for every two cups of flour.
Step 2: Add Chicken Broth
Slowly pour in the chicken broth while stirring the flour and carrot mixture. Continue to mix until a dough forms. The dough should be firm but not too dry or too sticky. Adjust the amount of chicken broth or flour as needed.
Step 3: Roll Out the Dough
On a lightly floured surface, roll out the dough to your desired thickness. A thickness of about 1/4 inch is a common choice, but you can make the biscuits thicker or thinner based on your pup’s preferences.
Step 4: Cut into Shapes
Use cookie cutters or a knife to cut the rolled-out dough into fun shapes that your pup will adore. Hearts, bones, and paw prints are popular choices, but you can get creative with any shape you like.
Step 5: Bake Until Golden Brown
Place the cut-out biscuits on a baking sheet lined with parchment paper. Bake them in a preheated oven at around 350°F (175°C) for about 25-30 minutes, or until they turn golden brown. Keep an eye on them to avoid overbaking.
Step 6: Cool and Serve
Once the biscuits are baked to perfection, allow them to cool completely before offering them to your eager pup. This step is essential to prevent any risk of mouth burns.
Why Your Dog Will Love Them
These homemade Chicken and Carrot Dog Biscuits are more than just a tasty treat; they offer numerous benefits that your dog will appreciate:
1. Delicious Flavor: The combination of chicken broth and carrots creates a savory and satisfying flavor that dogs can’t resist.
2. Nutrient-Rich: Carrots are a fantastic source of vitamins, particularly vitamin A, which supports your dog’s overall health.
3. Dietary Fiber: Carrots also provide dietary fiber, aiding in digestion and promoting a healthy gut.
4. Personal Touch: Crafting homemade treats allows you to add a personal touch to your dog’s diet and ensures they receive high-quality ingredients.
5. Reward and Training: These biscuits are perfect for training sessions or as a special reward for your pup’s good behavior.
Cardboard Box Maze
Dogs are natural problem solvers, and their curious minds are always eager for a new challenge. While a plain cardboard box may seem like a simple item, it can be transformed into an exciting and brain-teasing adventure for your furry friend. Enter the Cardboard Box Maze – a delightful DIY project that not only provides mental stimulation but also turns treat time into a thrilling puzzle game for your pup.
What You’ll Need: Cardboard Boxes
Before you embark on creating this canine labyrinth, gather the following materials:
- Cardboard Boxes: Collect various sizes of cardboard boxes. You can use old shipping boxes, moving boxes, or even cereal boxes, depending on the size and complexity of the maze you want to create.
How to Make It: Crafting Canine Fun
Creating a cardboard box maze is a fun and creative process. Follow these steps to make your pup’s puzzle adventure:
Step 1: Gather and Prepare the Boxes
Start by collecting the cardboard boxes you’ll use for your maze. Ensure they are clean and free from any tape, stickers, or labels that might pose a choking hazard to your dog.
Step 2: Cut Holes in the Boxes
Using a utility knife or scissors, carefully cut holes in the sides of the boxes. These holes will serve as entry and exit points for your dog as they navigate the maze. You can cut the holes in various shapes and sizes to add complexity and excitement to the challenge.
Step 3: Arrange the Boxes
Set up the cardboard boxes in an arrangement that creates a maze. You can make it as simple or as intricate as you like, depending on your dog’s problem-solving abilities and experience with puzzles. Leave gaps between the boxes to create pathways.
Step 4: Hide Treats Inside
Now comes the exciting part – hiding treats inside the maze! Place your dog’s favorite treats or kibble inside some of the boxes. This will motivate your pup to explore the maze, using their nose and problem-solving skills to find the hidden treasures.
Step 5: Encourage Exploration
Guide your dog to the entrance of the cardboard box maze and let them start their adventure. Observe their excitement as they sniff out the treats and navigate the twists and turns of the maze to uncover their rewards.
Why Your Dog Will Love It
The Cardboard Box Maze offers several benefits that your dog will appreciate:
1. Mental Stimulation: This DIY project engages your dog’s mind and encourages problem-solving. They’ll have to figure out how to reach the treats hidden inside the maze.
2. Physical Activity: As your dog explores the maze, they’ll get some exercise, especially if they’re excitedly running between boxes.
3. Sensory Stimulation: The scent of hidden treats adds an extra layer of sensory stimulation, making the game even more captivating for your pup.
4. Bonding Time: You can join in on the fun by guiding your dog through the maze or watching their progress. It’s an excellent way to strengthen your bond.
5. Enrichment: Enrichment activities like this one are vital for a dog’s mental and emotional well-being. They prevent boredom and can reduce undesirable behaviors.
No-Sew Fleece Blanket
Cuddling with your dog on a chilly night is one of life’s simple pleasures. A warm and soft blanket can make those moments even more special. Enter the No-Sew Fleece Blanket – a delightful DIY project that requires no sewing skills and provides your furry friend with the comfort and warmth they deserve. Whether it’s for snuggling on the couch, adding an extra layer of coziness to their bed, or a thoughtful homemade gift for a dog-loving friend, this blanket is a win-win for both you and your pup.
What You’ll Need: Fleece Fabric
Before you start crafting this cozy blanket, gather the following materials:
- Fleece Fabric: Select a piece of fleece fabric in your preferred color or pattern. The size of the fabric will determine the dimensions of your blanket. Consider the intended use – whether it’s for your dog’s bed or for wrapping them up during chilly evenings.
How to Make It: Crafting Cozy Comfort
Creating a no-sew fleece blanket is a simple and enjoyable process. Follow these steps to make your pup’s new favorite blanket:
Step 1: Choose Your Fabric
Begin by selecting a piece of fleece fabric that suits your style and your dog’s preferences. Fleece is an excellent choice because it’s soft, warm, and easy to work with.
Step 2: Cut the Fabric
Lay the fleece fabric flat on a clean, spacious surface. Use sharp fabric scissors to trim any uneven edges or selvage from the fabric. If you want to create a blanket with fringed edges, cut evenly spaced strips along all four edges of the fabric. The width of the strips can vary depending on your preference, but a common width is about 1 to 2 inches.
Step 3: Tie the Strips
After cutting the strips along the edges, it’s time to tie them together. Take one strip from the top piece of fabric and one strip from the bottom piece of fabric that are aligned with each other. Tie them together in a simple knot, ensuring it’s tight enough to hold the two pieces together but not so tight that it distorts the fabric. Continue tying the strips together along all four sides of the blanket.
Step 4: Trim Excess Fabric (Optional)
Once you’ve tied all the strips, you can trim any excess fabric from the knots to create a neater appearance. Be careful not to cut too close to the knots to prevent them from coming undone.
Step 5: Fluff and Enjoy
Give your blanket a gentle shake and fluff it up to make it even cozier. It’s now ready for your pup to enjoy!
Why Your Dog Will Love It
The No-Sew Fleece Blanket offers several benefits that your dog will appreciate:
1. Warmth and Comfort: Fleece fabric is soft, warm, and provides a comfortable surface for your dog to snuggle on.
2. Versatility: Use the blanket on your dog’s bed, couch, or as an extra layer in their crate during colder months.
3. Personalized: You can choose a fleece fabric that matches your dog’s personality or your home decor.
4. Easy Maintenance: Fleece is easy to clean and can be machine-washed and dried, making it a practical choice for a dog blanket.
5. Homemade Love: This DIY project allows you to add a personal touch to your dog’s comfort, showing them just how much you care.
Banana and Blueberry Popsicles
Dogs, like humans, appreciate a refreshing treat on a hot day. While ice cream might be tempting, a healthier and equally delicious alternative is the Banana and Blueberry Popsicle. These homemade frozen treats are not only cooling but also packed with nutrients, making them a delightful way to keep your furry friend refreshed and satisfied.
What You’ll Need: Bananas, Blueberries, Water
Before you dive into creating these frosty delights, ensure you have the following ingredients at hand:
- Bananas: Bananas are not only tasty but also provide potassium, fiber, and essential vitamins.
- Blueberries: Blueberries are a superfood for both humans and dogs. They’re rich in antioxidants and vitamins that support your pup’s overall health.
- Water: Water is the secret ingredient that turns these ingredients into frozen popsicles. It ensures the mixture freezes into a delightful treat.
How to Make It: Crafting Cool Canine Treats
Creating Banana and Blueberry Popsicles is a breeze. Follow these simple steps to whip up a batch for your pup:
Step 1: Prepare the Ingredients
Peel the bananas and wash the blueberries thoroughly. Make sure both are fresh and free from any mold or spoilage.
Step 2: Blend the Ingredients
Place the bananas, blueberries, and a splash of water in a blender. The amount of water can vary depending on your desired consistency. Start with a small amount, and you can add more if needed. Blend the ingredients until you have a smooth, creamy mixture.
Step 3: Pour into Ice Cube Trays
Pour the blended mixture into ice cube trays. You can also use silicone molds in fun shapes if you want to add an extra touch of creativity to your popsicles.
Step 4: Freeze Until Solid
Place the ice cube trays or molds in the freezer and let them freeze until solid, which usually takes a few hours or overnight.
Step 5: Pop Out and Serve
Once the popsicles are frozen, pop them out of the trays or molds. They should come out easily. Place the popsicles in a container or resealable bag for easy storage.
Step 6: Treat Your Pup
Now, it’s time to treat your furry friend to a Banana and Blueberry Popsicle! Hand one over on a hot day, and watch as your dog enjoys the refreshing and fruity goodness.
Why Your Dog Will Love Them
These homemade popsicles offer several benefits that your dog will appreciate:
1. Refreshing: The icy texture of the popsicle helps your dog cool down on a hot day.
2. Nutrient-Rich: Bananas and blueberries are packed with vitamins, minerals, and antioxidants that support your dog’s well-being.
3. Hydration: The added water helps keep your pup hydrated, which is crucial, especially during warm weather.
4. Low in Calories: These treats are relatively low in calories, making them suitable for most dogs, including those watching their weight.
5. Homemade Love: Making your dog’s treats allows you to ensure they’re free from harmful additives or preservatives, and it adds a personal touch to your pup’s snack time.
Interactive Bottle Puzzle
Dogs are naturally inquisitive creatures, and their love for puzzles and challenges is undeniable. Engaging your dog’s mind is just as important as physical exercise, and the Interactive Bottle Puzzle is a fantastic DIY project that accomplishes just that. It’s an entertaining way to keep your pup mentally stimulated while they work to retrieve tasty rewards. Plus, it’s a simple and budget-friendly option that can provide hours of entertainment.
What You’ll Need: An Empty Plastic Bottle, Dog Kibble or Treats
Before you embark on creating this canine brain-teaser, gather the following materials:
- An Empty Plastic Bottle: You can use a clean, empty plastic water bottle or a soda bottle. Choose one that’s an appropriate size for your dog, ensuring it’s not too large or too small.
- Dog Kibble or Treats: Select your dog’s favorite kibble or treats. The treats should be small enough to fit through the opening of the bottle.
How to Make It: Crafting Canine Fun
Creating the Interactive Bottle Puzzle is a straightforward and enjoyable process. Follow these steps to keep your pup entertained and mentally engaged:
Step 1: Prepare the Bottle
Remove any labels, caps, and plastic rings from the bottle to make it safe for your dog to interact with. Rinse it thoroughly to ensure it’s clean and free from any residual odors.
Step 2: Fill with Treats
Place a handful of dog kibble or treats into the empty bottle. You can adjust the quantity based on the size of the bottle and the level of challenge you want to provide for your pup. Make sure the treats are small enough to fall out when the bottle is manipulated.
Step 3: Seal the Bottle
Once the treats are inside the bottle, securely close the cap. Ensure that it’s tightly sealed to prevent the treats from easily falling out. The goal is to make it a challenge for your dog to access the goodies.
Step 4: Present the Puzzle
Now, it’s time to present the Interactive Bottle Puzzle to your pup. Hand it over to them and watch as they figure out how to manipulate the bottle to release the treats. You can offer guidance and encouragement as needed.
Why Your Dog Will Love It
The Interactive Bottle Puzzle offers several benefits that your dog will appreciate:
1. Mental Stimulation: This DIY puzzle toy engages your dog’s mind as they work to solve the puzzle and access the treats.
2. Problem-Solving: Your pup will need to figure out how to manipulate the bottle to release the rewards, encouraging problem-solving skills.
3. Entertainment: It provides hours of entertainment, especially on rainy days or when your dog needs an indoor activity.
4. Treat Rewards: The treats inside the bottle serve as a delicious reward, making it a win-win for your dog.
5. Budget-Friendly: It’s an inexpensive way to provide mental stimulation and enrichment for your pup.
Final Thoughts on Doggy DIY Projects
These 10 doggy DIY projects are not only a fun way to bond with your furry friend but also a practical approach to providing entertainment and treats without breaking the bank. Whether you’re looking to keep your pup mentally stimulated or simply want to shower them with love, these homemade toys and treats are sure to elicit tail wags and slobbery smiles.
FAQs (Frequently Asked Questions)
Q1. Are these DIY treats and toys safe for all dogs?
Most of these DIY projects are safe for the majority of dogs. However, always consider your dog’s dietary restrictions and any allergies they may have when making treats. Additionally, supervise your pup during playtime to ensure their safety with homemade toys.
Q2. How often can I give my dog homemade treats?
Homemade treats can be given to your dog in moderation as part of their daily diet. Be mindful of portion sizes to avoid overfeeding.
Q3. Can I substitute ingredients in the treat recipes?
You can make ingredient substitutions in treat recipes based on your dog’s preferences and dietary needs. However, ensure that the substituted ingredients are safe for dogs.
Q4. Are these toys suitable for aggressive chewers?
Some of these DIY toys may not withstand the intense chewing of aggressive chewers. It’s essential to choose or adapt toys that are appropriate for your dog’s chewing habits.
Q5. Can I use these toys and treats for puppies?
Many of these DIY projects are suitable for puppies, but consider their age and size when selecting or making toys and treats. Ensure that toys are not too small to avoid choking hazards.
Now that you’re armed with creative and budget-friendly DIY ideas, it’s time to embark on a journey of crafting happiness for your four-legged friend. Your pup will appreciate the love and effort you put into making their life even more delightful.
